Account
AI connections
Claude or ChatGPT reaches your account through a connection you approve. The Connected AI page lists each one, and you can disconnect any of them.
Querywright works inside Claude or ChatGPT. Each AI you connect holds an authorization to your account, approved by you in your browser, instead of an API key. A connection gives that AI access to your account’s sites, evidence and the workflow actions Querywright permits. The decisions stay yours: see Your decisions.
Before you start
- A Querywright account with setup underway. Connecting your AI is the third setup step, after Plan and Site.
- Claude or ChatGPT that can add a custom connection. In Claude that is a custom connector. In ChatGPT it is an app created in developer mode, if your ChatGPT plan or workspace allows it.
Connect an AI
- Open Settings → Connected AI and copy the Connection address:
https://mcp.querywright.com/mcp. - Start the connection from Claude or ChatGPT, using that address. The steps for each are in Connect Claude and Connect ChatGPT.
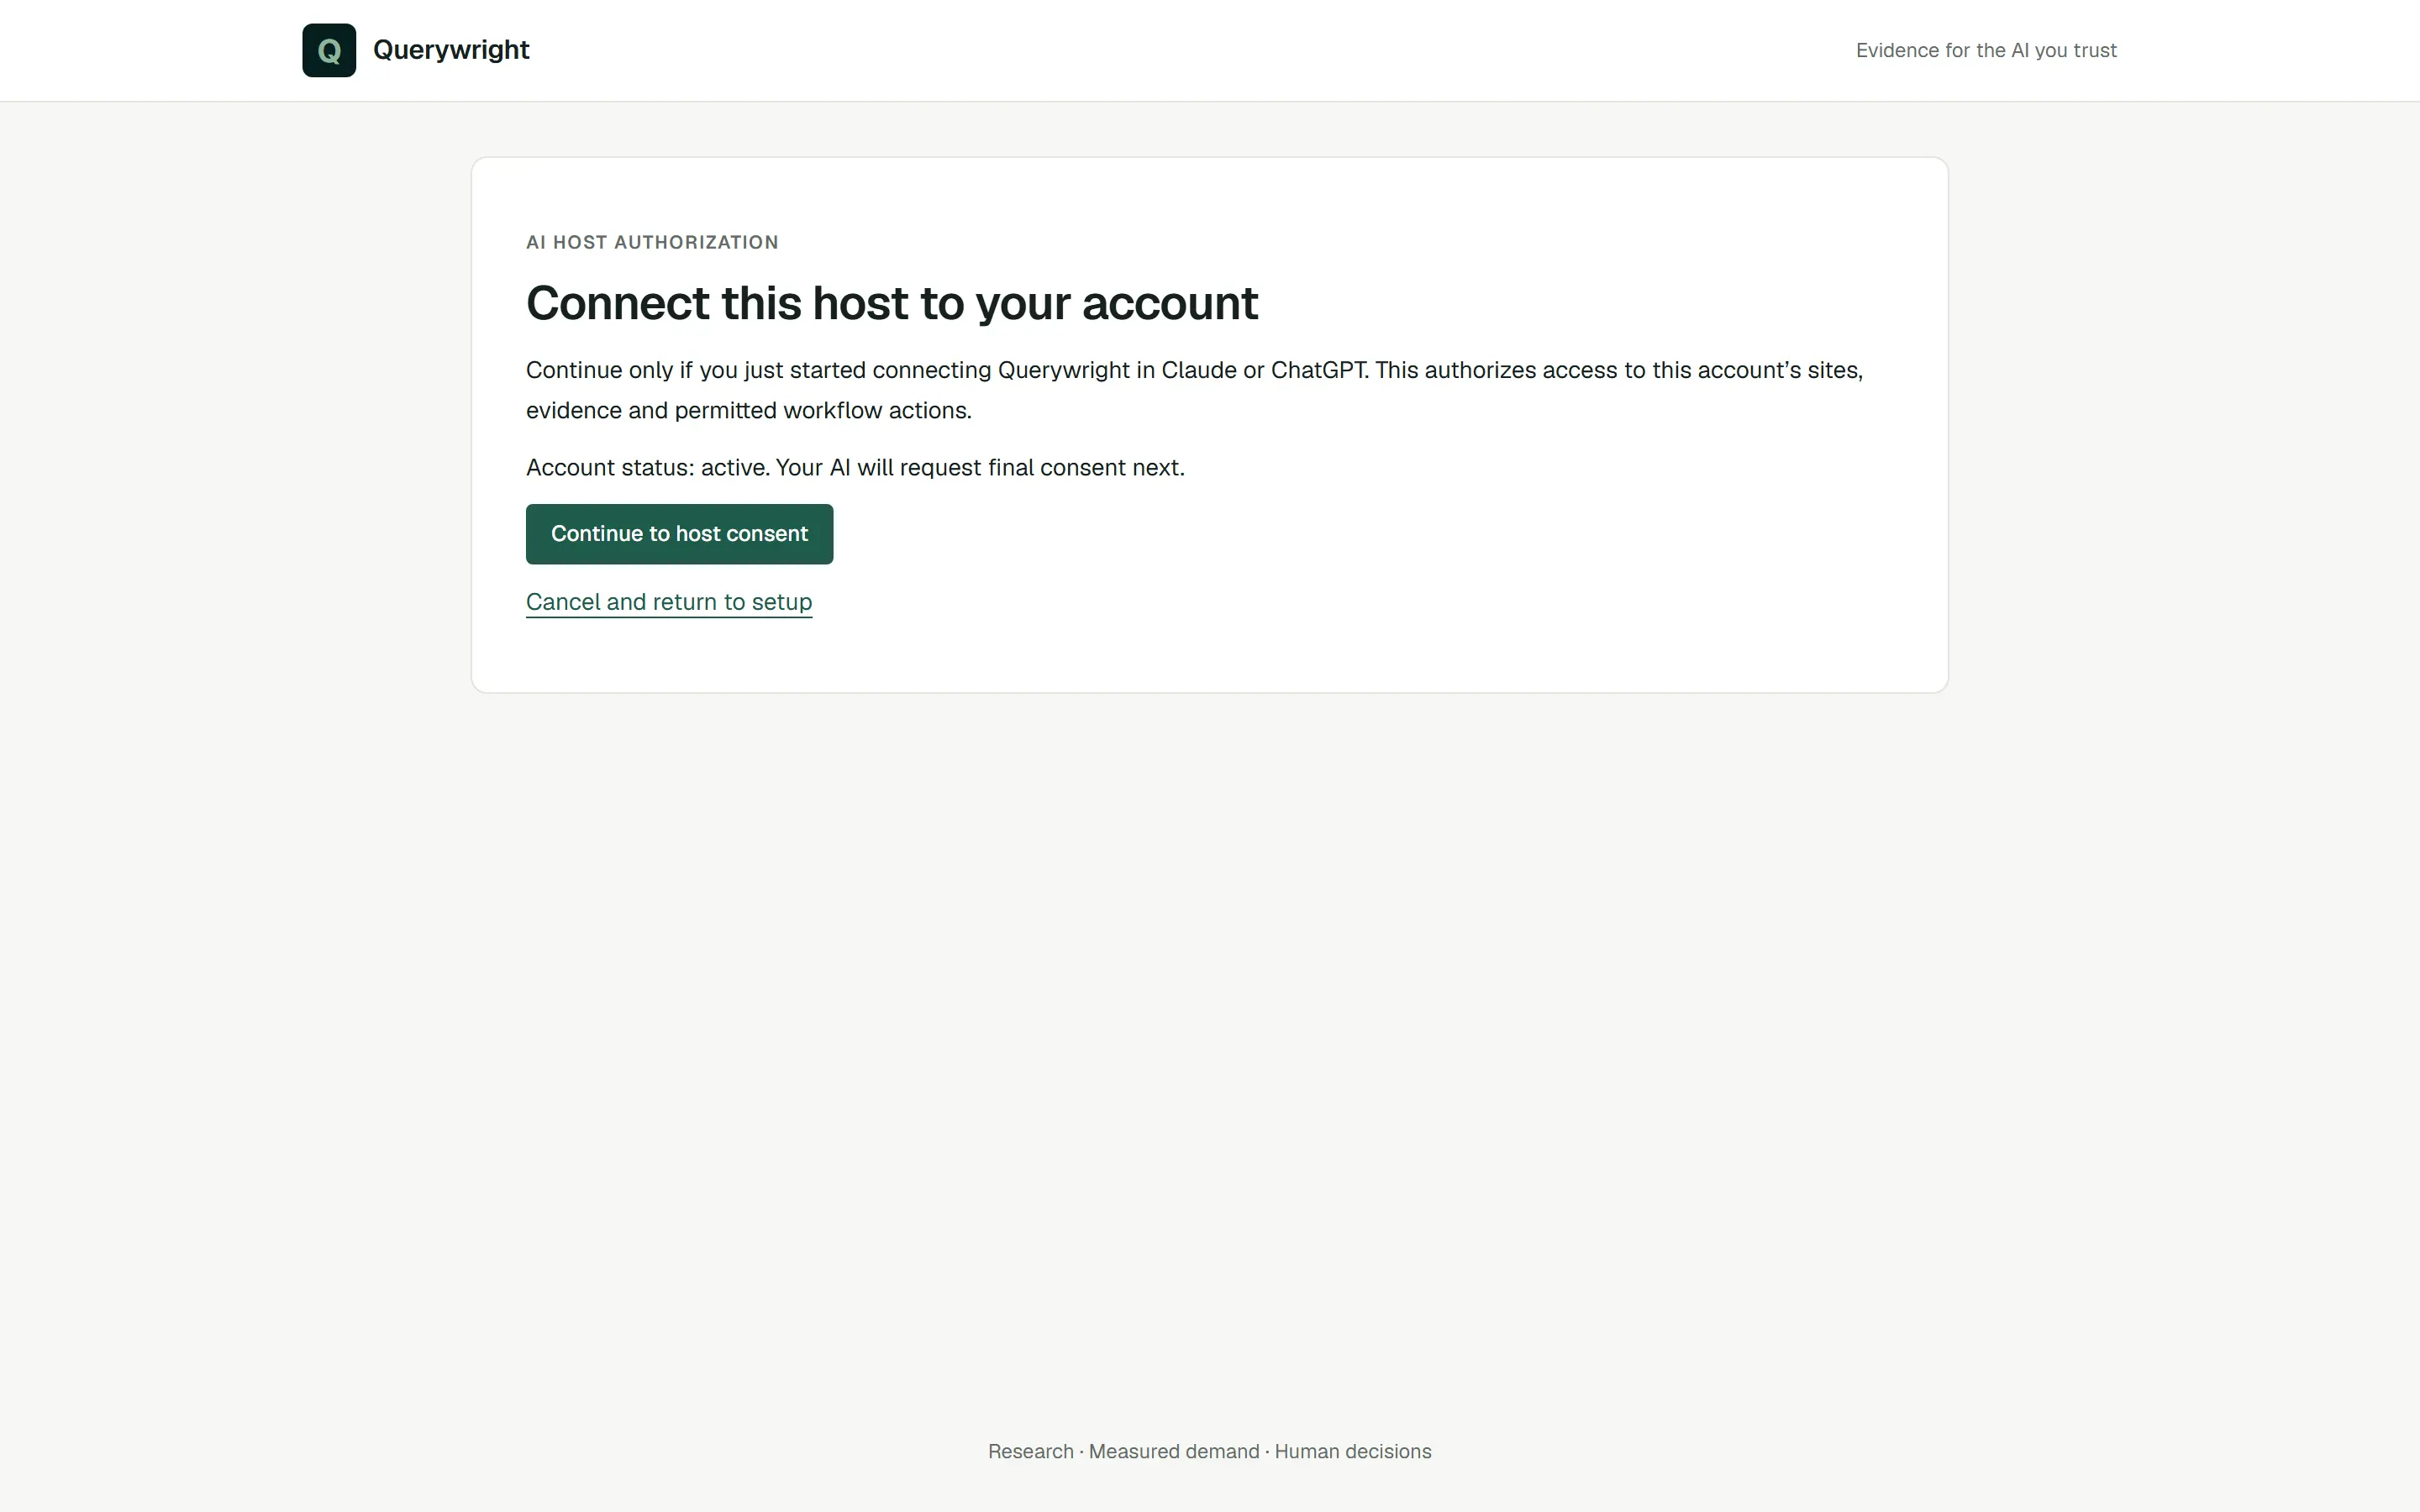
- Your AI opens Querywright in your browser. Sign in if asked. The page reads “Connect this host to your account”. Press Continue to host consent, then approve access on your AI’s own screen.
- Back in Settings → Connected AI, press Refresh. The App shows “Connection status refreshed.” and the new connection appears in the list.
The connection list
Settings → Connected AI lists each connection as “Connection 1”, “Connection 2” and so on, with the date it was connected, for example “Connected Oct 3, 2026”. The list does not name the AI, so use the dates to tell connections apart. “No AI connected yet.” means no AI can use your account.
- One connection per connector. When the same Claude connector or ChatGPT app connects again, the new connection replaces its earlier one once it is used.
- A connector you removed and added again can show up as a new connection. Disconnect the older one if you no longer use it.
- Connected is not online. A connection in the list means the authorization was completed. It does not show whether your AI has used Querywright recently.
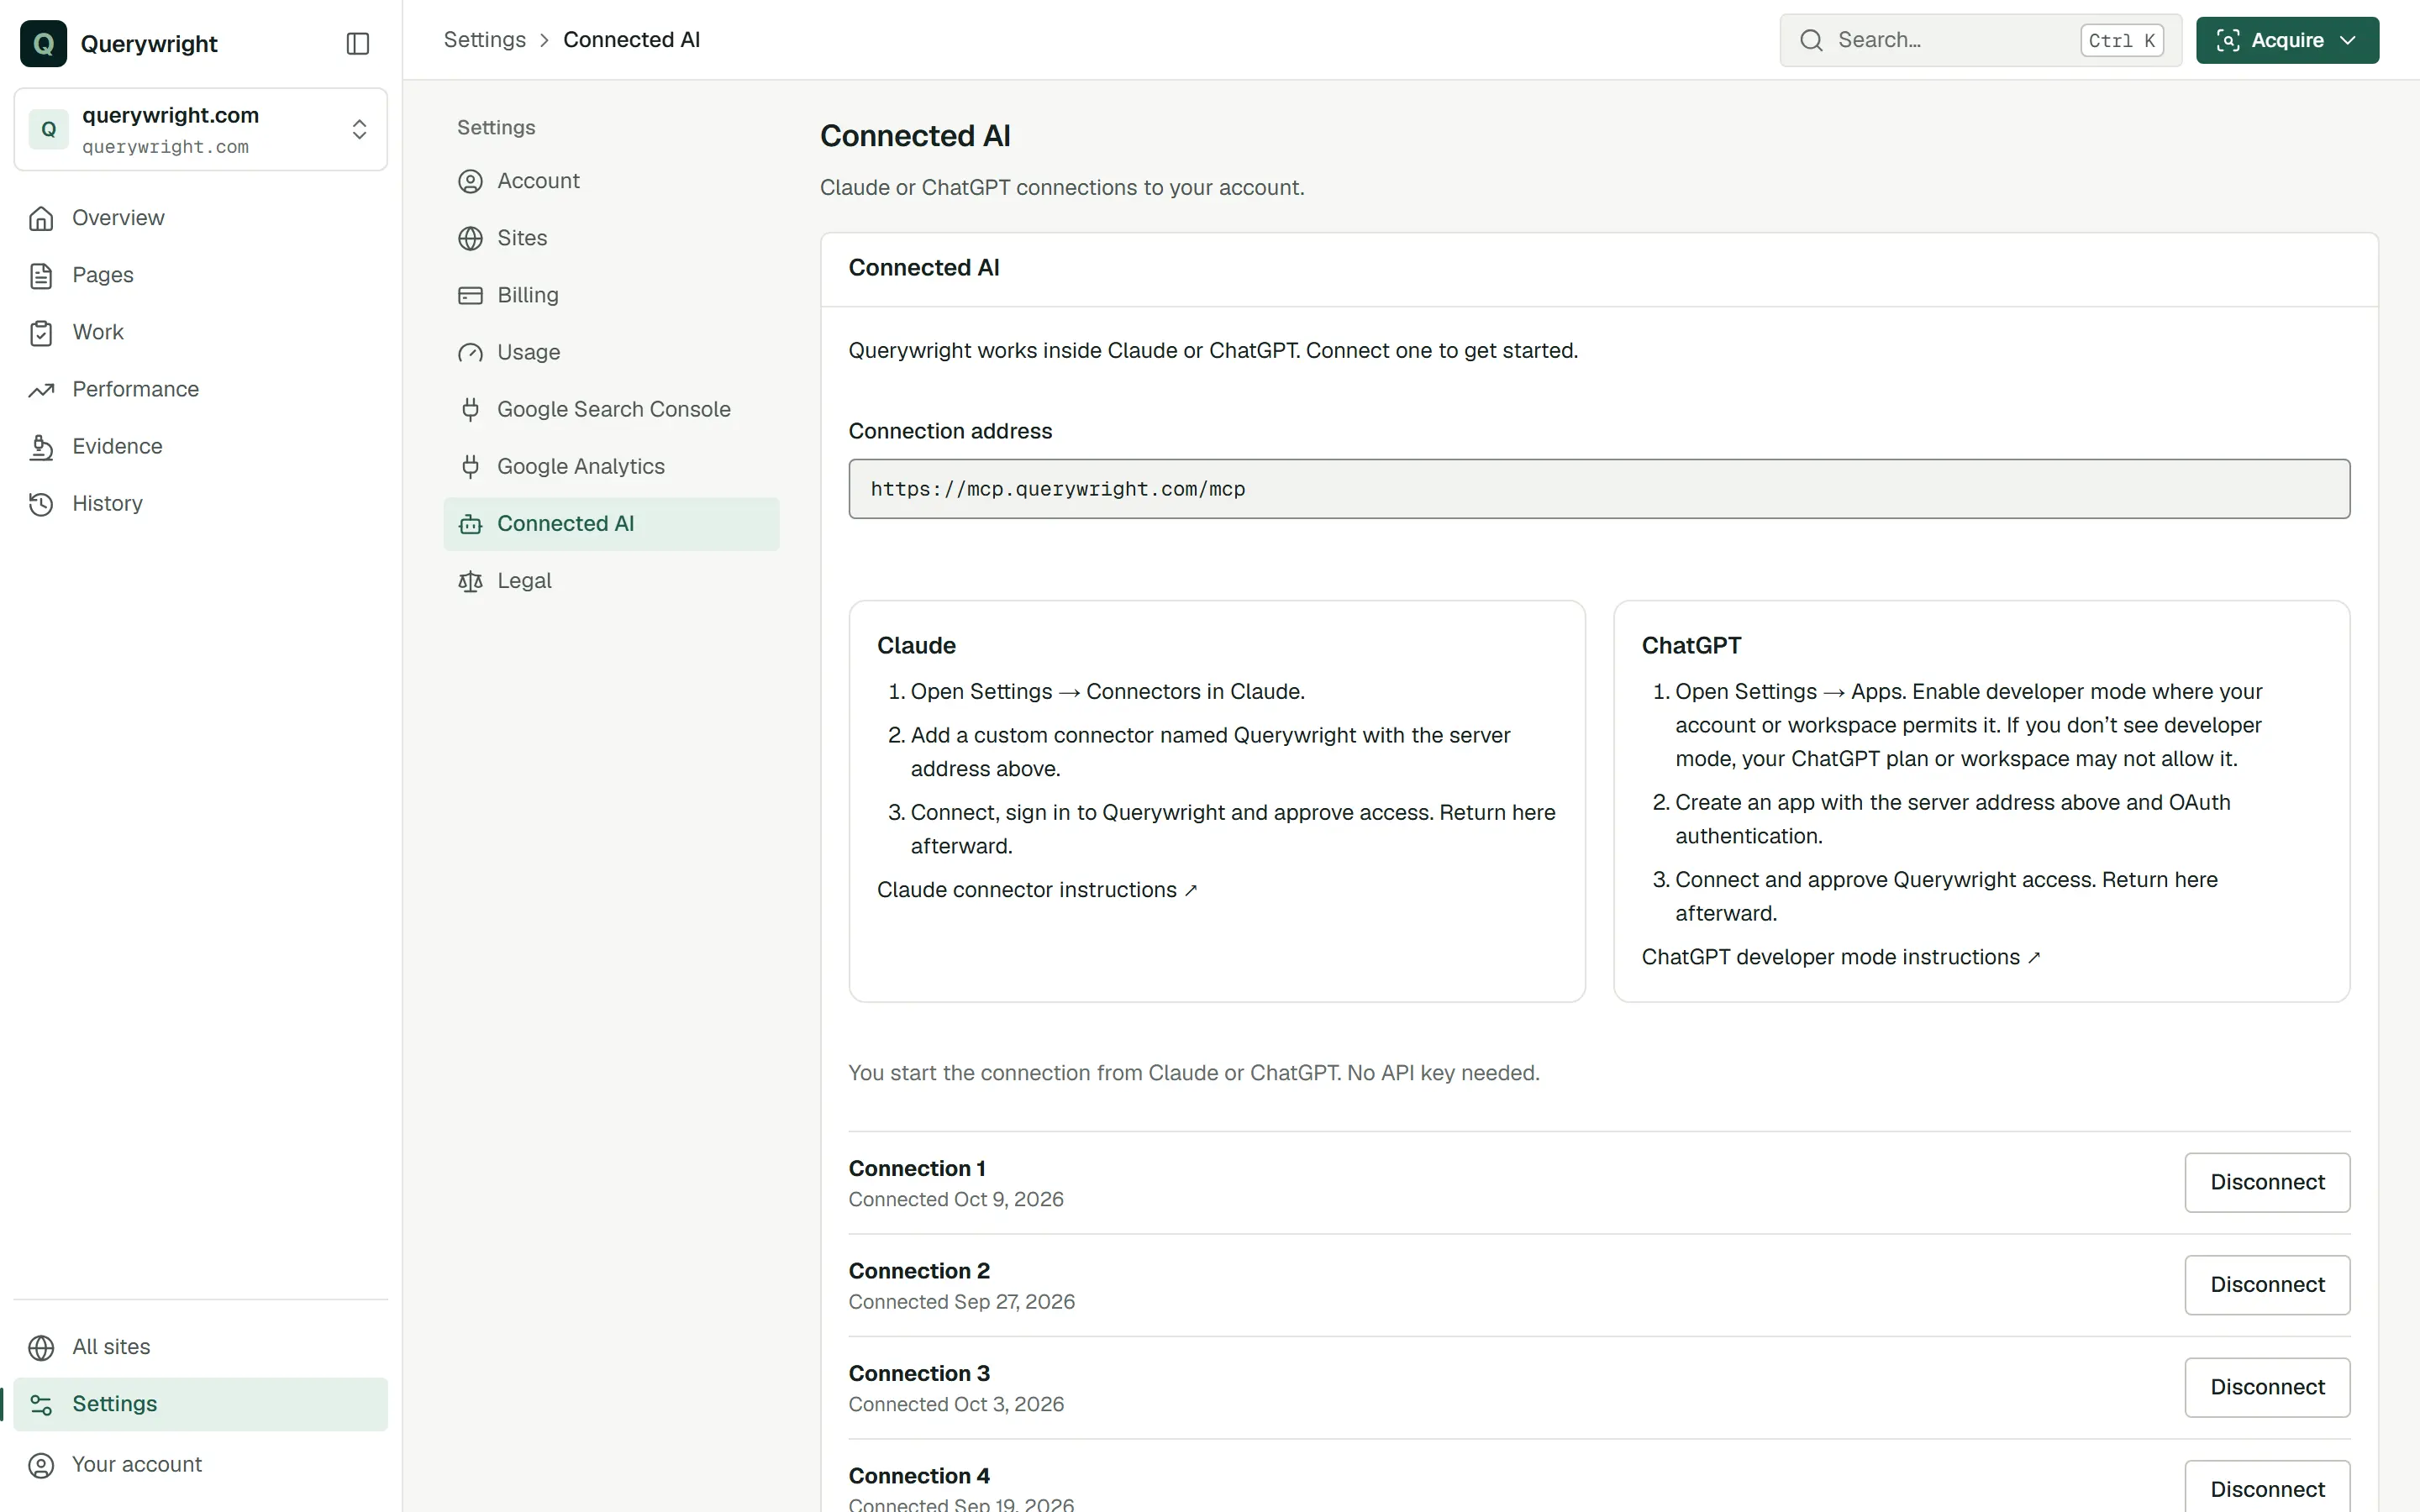
Disconnect an AI
- In Settings → Connected AI, press Disconnect beside the connection.
- The App asks “Disconnect this AI?” and explains “It loses access to your Querywright account right away.”
- Press Disconnect, or Keep connected to stop.
The App confirms “Disconnected. This AI can no longer use your account.” Your sites and saved work are not affected. You can also remove the Querywright connector or app in Claude or ChatGPT so it stops offering the tools.
If you disconnect every connection, Settings shows Continue setup until you connect an AI again. Deleting your account disconnects every connection; see Your subscription.
What you’ll see in the App
- The account menu at the bottom of the rail has a Connected AI link to the same page.
- Settings → Account shows Setup as “Complete” once a plan, a site and an AI connection are all in place.
- After connecting, Settings → Account has a Starter prompt button with the instruction to send your AI for a first scan. See Your first site scan.
If something goes wrong
- “This connection request is invalid or expired. Start again from your AI host.”, no Querywright tools in your AI, or an out-of-date tool list after an update: Connector problems.
- “This AI could not be disconnected. Try again.”: press Disconnect again. See Common messages.
Last updated