Getting started
Connect ChatGPT
Querywright connects to ChatGPT as an app you create in developer mode. You sign in once in your browser and ChatGPT holds an authorization you can revoke. There is no API key.
Before you start
- A ChatGPT account where developer mode is allowed. Whether you can turn it on depends on your ChatGPT plan and, in a workspace, on your admin’s settings. If you don’t see developer mode, your plan or workspace may not allow it. OpenAI’s developer mode instructions say where the switch currently lives.
- A Querywright account past the Plan and Site steps of setup. Connecting your AI is the third step, so setup will be asking for it. See getting started.
Steps
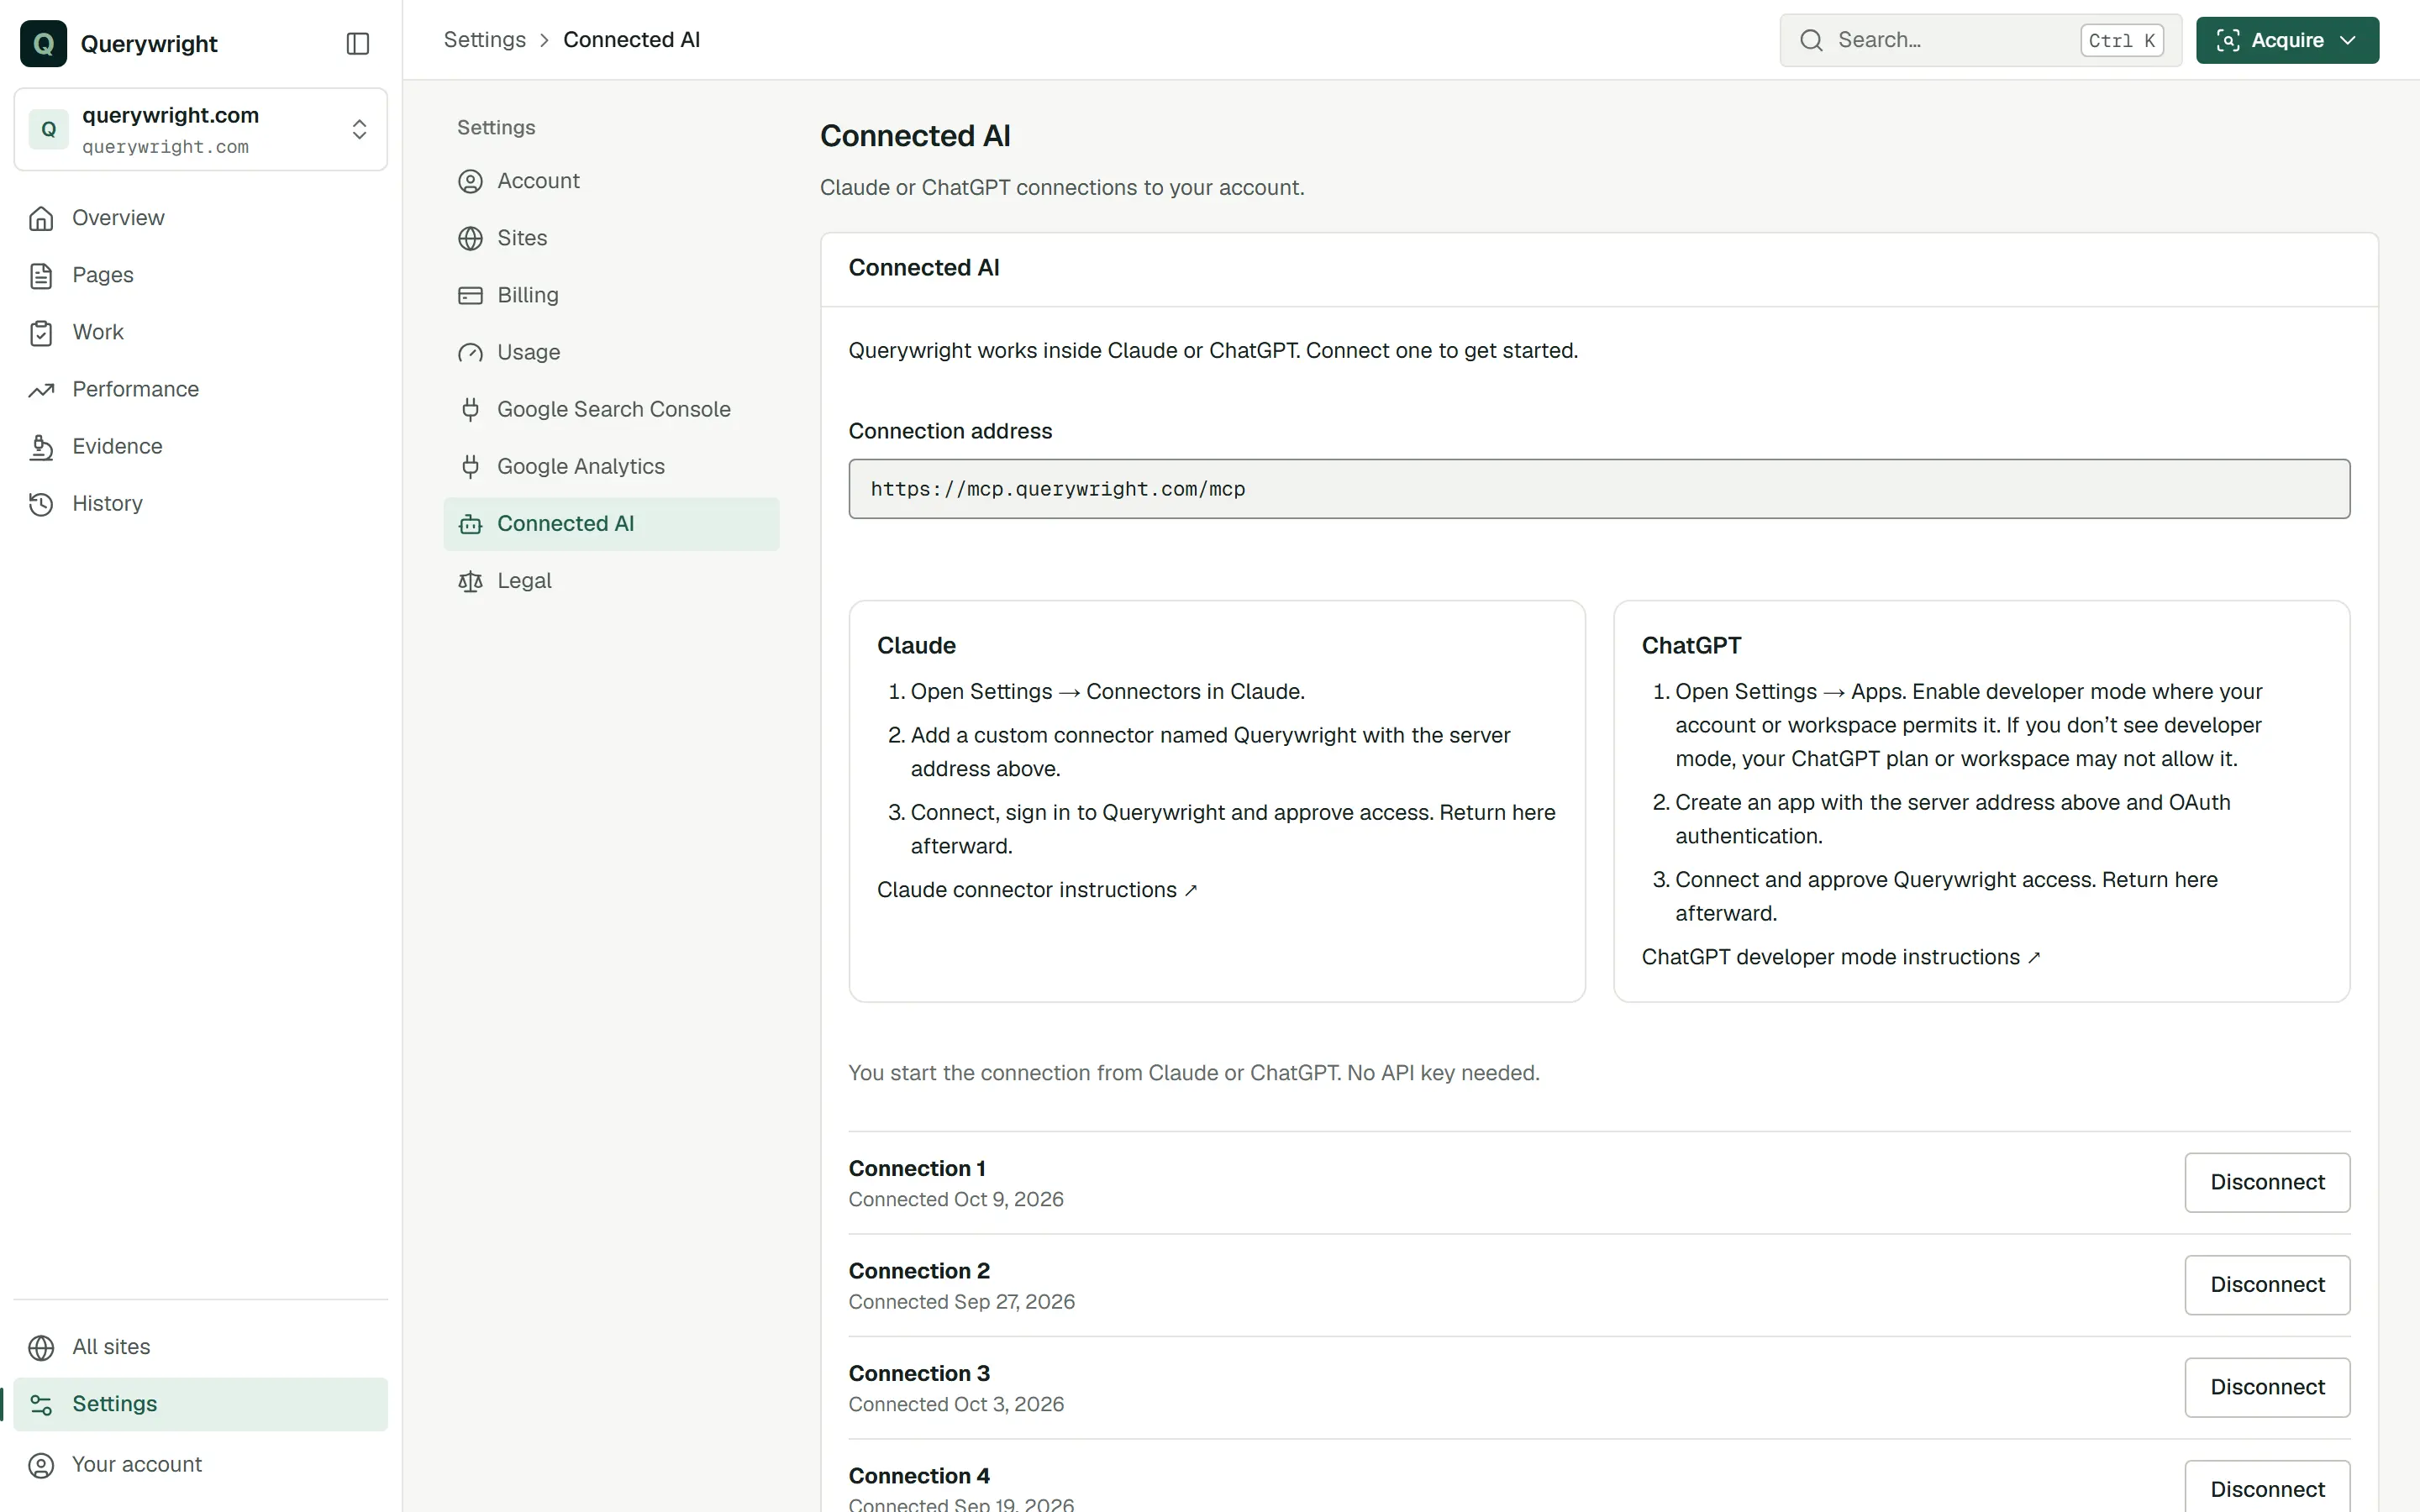
- Copy the connection address. In Querywright, stay on the Connect AI step of setup, or open Settings → Connected AI. Select and copy the Connection address:
https://mcp.querywright.com/mcp - Turn on developer mode. In ChatGPT, open Settings → Apps and enable developer mode where your account or workspace permits it.
- Create the Querywright app. Create an app with the connection address and OAuth authentication. Name it Querywright and save it.
- Connect. Connect the new app. ChatGPT opens a “Connect Querywright” page in your browser. Choose Continue with Querywright account, and sign in if the App asks you to.
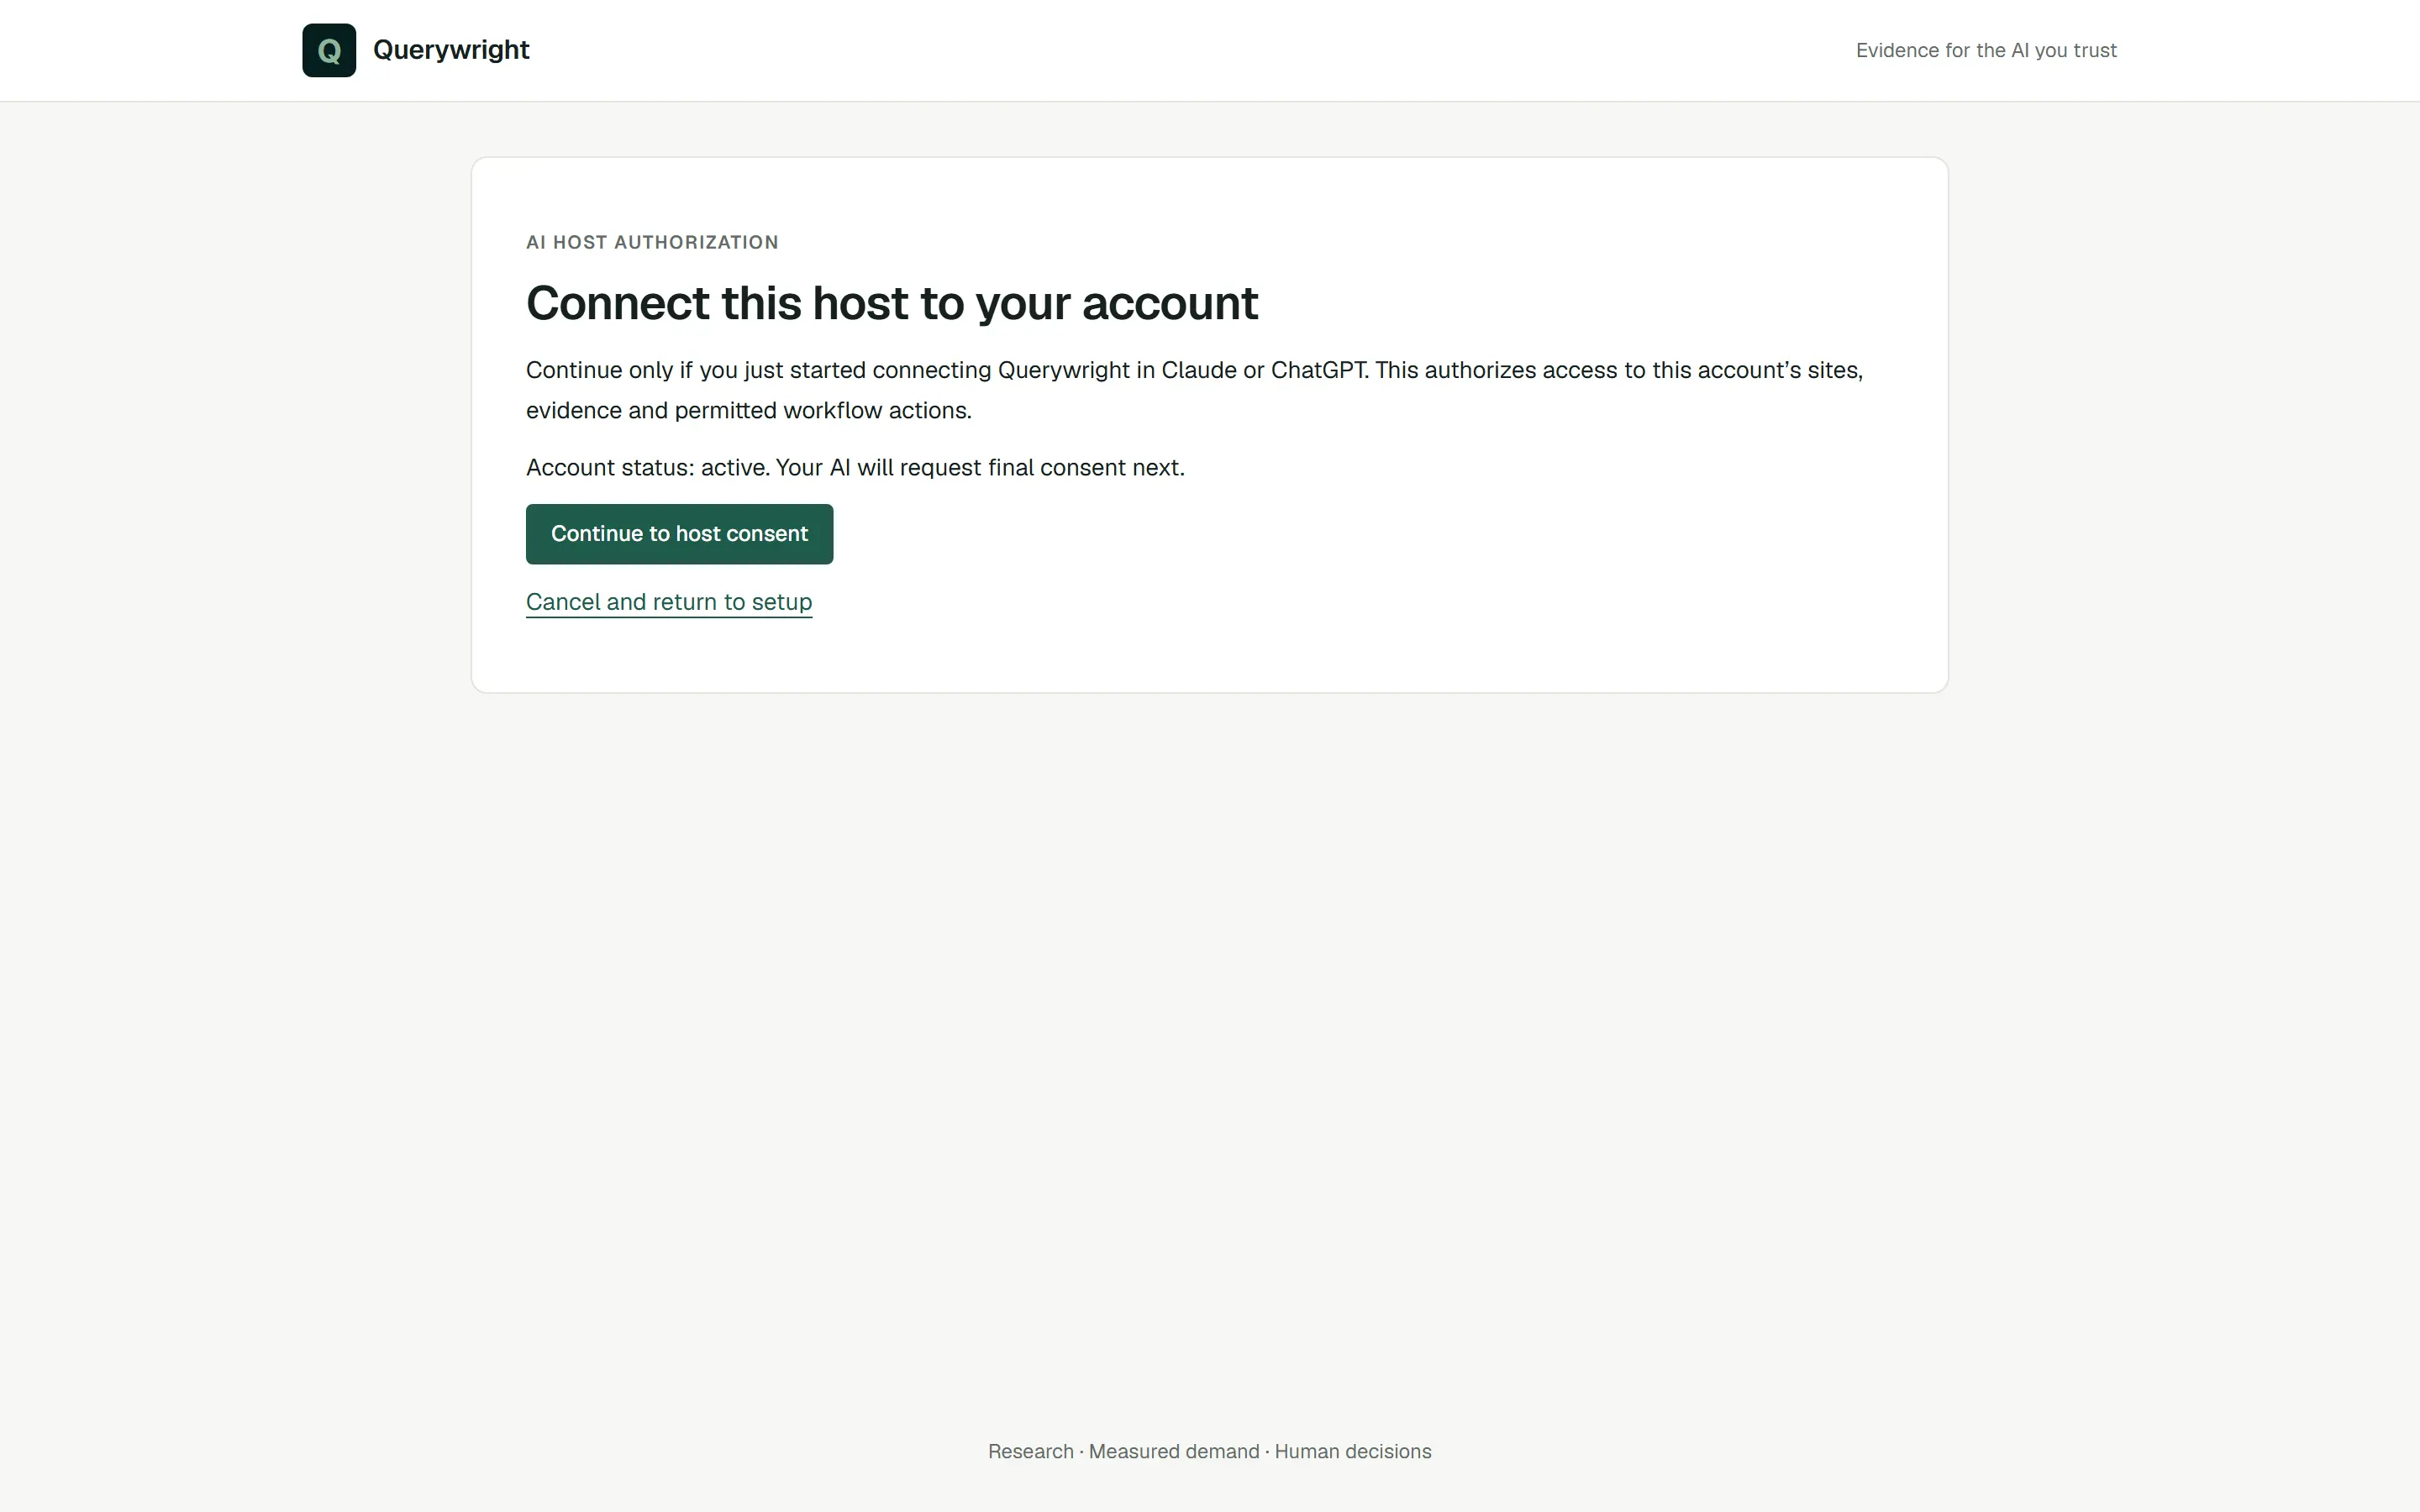
- Hand off to ChatGPT’s consent. The App shows “Connect this host to your account”. Continue only if you started connecting in ChatGPT a moment ago, then press Continue to host consent.
- Authorize. The “Authorize Querywright” page names ChatGPT as the app requesting access. Press Authorize Querywright. ChatGPT finishes the connection on its side.
- Confirm it in Querywright. Back in Settings → Connected AI (or the Connect AI step), press Refresh. A completed connection is listed as “Connection 1” with the date it was connected.
- Use it in a conversation. Start a new ChatGPT conversation, select the Querywright app for it, paste the starter instruction from setup and send it.
What you’ll see in the App
Settings → Connected AI lists each connection as “Connection 1”, “Connection 2” and so on, with the date it was connected and a Disconnect button. “Connected” means ChatGPT completed the authorization; it is not a live signal that ChatGPT is online or has used Querywright recently. Connecting ChatGPT again replaces the earlier ChatGPT authorization once the new one is used. More in AI connections.
If something goes wrong
- “This connection request is invalid or expired. Start again from your AI host.” The authorization link was reused or timed out. Go back to ChatGPT and connect again; refreshing the Querywright page does not help.
- No connection is listed after Refresh. ChatGPT did not complete the connection. Start again from ChatGPT, not from the App.
- The app shows no Querywright tools. Start a new conversation and select the app again. If it still lists nothing, remove the app and create it again with the same address.
- You can’t find developer mode. Your ChatGPT plan or workspace may not allow it; ask your workspace admin, or connect Claude instead.
More cases are in connector problems.
Last updated